PC Gamer is supported by its audience. When you buy through links on our site, we may earn an affiliate commission. Learn more
By published
And the rewards you can find in each.
Wondering if you should venture into the Elden Ring dungeons littered throughout the Lands Between? The power grind in Elden Ring is much slower than in other Souls games, but fighting through dungeons to defeat their Elden Ring bosses is one of the best ways to get runes and gain power.
These dungeons aren’t particularly difficult to find, but it’s useful to know what type of rewards they offer so you can focus on those that are most useful or farm them for extra materials, such as Elden Ring Smithing Stones. This list covers the dungeons in the starting area of Limgrave, but we’ll be sure to add more as we find them. So if you’re ready to get started, here’s where to find the Elden Ring dungeons and the rewards you can expect from each.
Dungeons contain useful materials—catacomb dungeons, for instance, give you Glovewort, a flower that is used to improve the strength of your summons with the Elden Ring Spirit Calling Bell once you unlock Spirit Tuning. Aside from that, they can also provide you with unique weapons and talismans.
Most dungeons are pitch-black, so you’ll want to buy yourself a torch from the merchant in the Church of Elleh before you set off to explore one. You can also get a hands-free lantern from the merchant in the Lakes of Liurnia area, after you’ve defeated the Stormveil Castle boss. One final thing to note: you can turn off flame turrets by hitting them.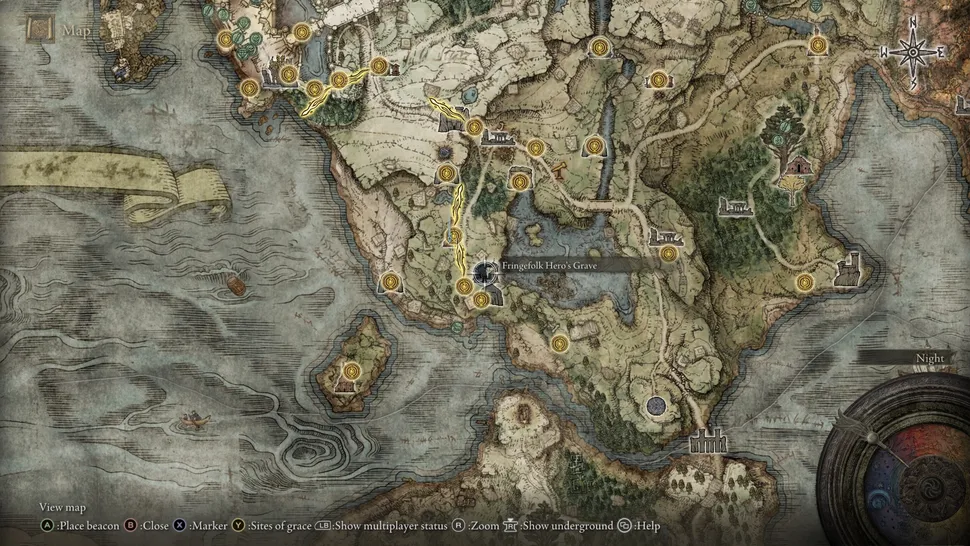
This dungeon is accessible at the Stranded Graves with a Stonesword Key. This is one of the toughest dungeons in Limgrave.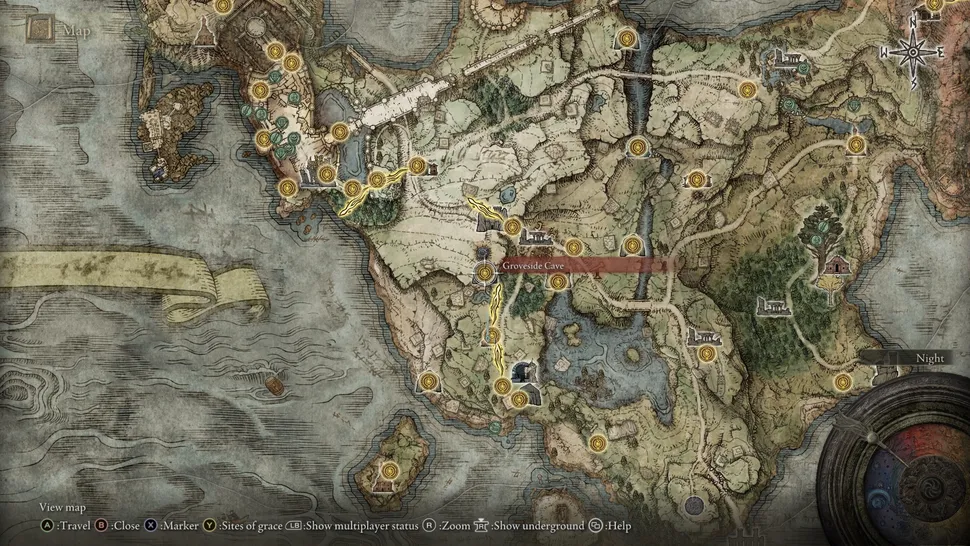
This is found north of the Church of Elleh past the turtle pond, with soldiers scattered around its entrance. Fight through the wolves, while staying wary of those sleeping around the cave, and you’ll soon reach the boss. The Beastman of Farum Azula is very easy, and you can stun-lock him with attacks, so just dodge/block and deal damage when you can.
Elden Ring guide: Conquer the Lands Between
Elden Ring bosses: How to beat them
Elden Ring golden seeds: Upgrade your flasks
Elden Ring paintings: Solutions and locations
Elden Ring map fragments: Reveal the world
Elden Ring co-op: How to squad up online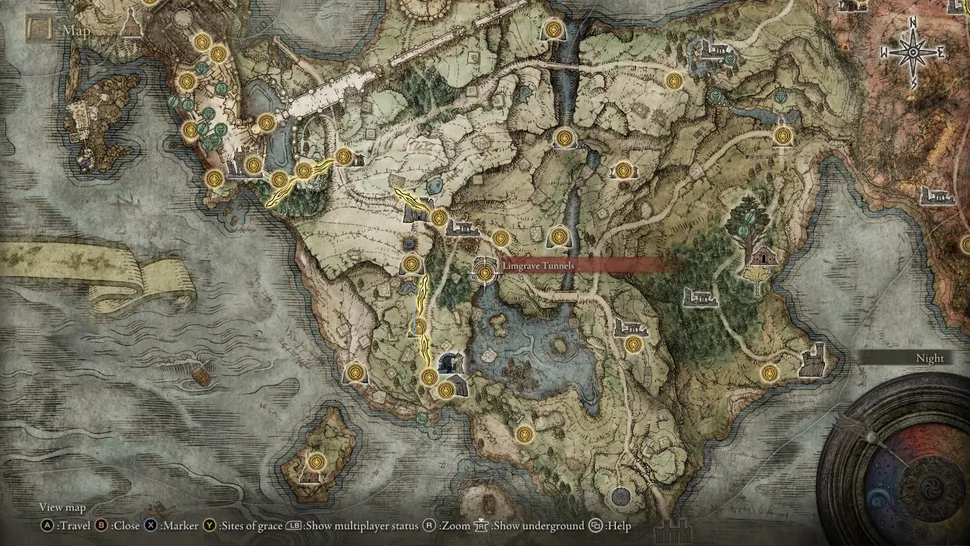
This dungeon is at the northernmost tip of the lake to the right of the Stranded Graveyard. Head down the lift and enter into a chamber with miners. The ones digging aren’t hostile unless attacked, but the ones standing around will throw rocks or try to hit you. Head down the platform, then through the tunnel to another lift. When the lift is halfway down, jump off onto the platform you can see.
Enter the next chamber and head left. Be wary of the lantern bearers who can spew fire and make the other miners aggressive towards you. At the bottom of the lift, go straight ahead to find the Stonedigger Troll boss. He’s quite easy, just stick around his legs as with any troll, and be wary of his downward smash attacks. He drops the Roar Medallion that enhances breath and roar attacks. This dungeon is also a great way of getting Smithing Stones early on.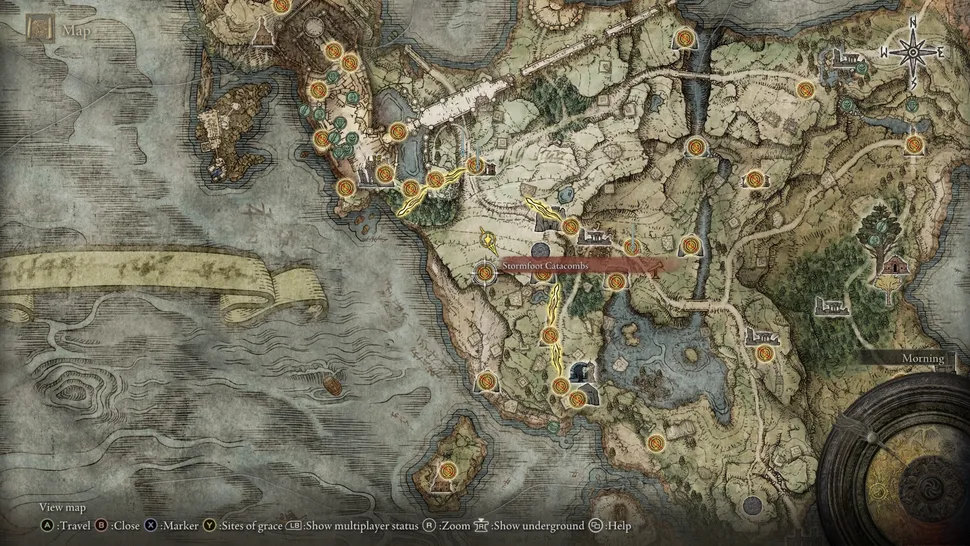
This one’s pretty easy as long as you watch out for the usual imps pretending to be statues, or hanging from the walls. Head through until you get to the flame turret, then run to the right to be faced with another flame turret. Then do the same again.
It’s worth noting that behind that first turret is an item that lets you say «Hello!». After the second flame turret, climb the ladder to a balcony with two imps, and the Wandering Noble Ashes nearby. Drop down to the platform, then drop down again to find a level and open the door to the boss. The Erdtree Burial Watchdog is pure nightmare fuel, but easy to beat. 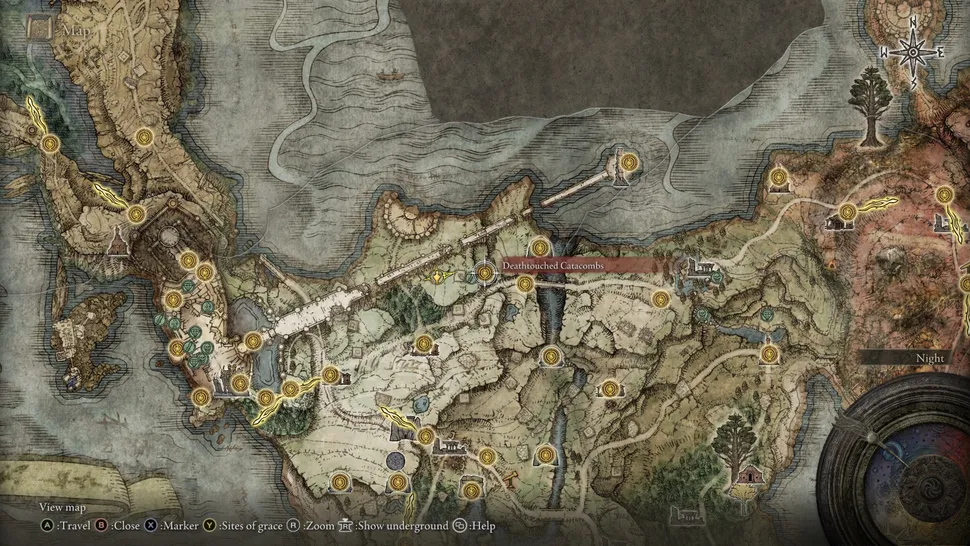
You can find this dungeon set into the cliff to the east of the Warmaster’s Shack on Stormhill. It’s a pretty simple run with no real traps, you just have to aware of the bones scattered around that transform into skeletons when you walk by. The skeletons themselves aren’t tough, especially if you bring a weapon with holy damage. Head through until you find the lever, pull it, and head back to the boss door at the start. Like his undead pals, the Black Knife Assassin boss is suceptible to holy damage, and will struggle to deal with any mobs you summon against him.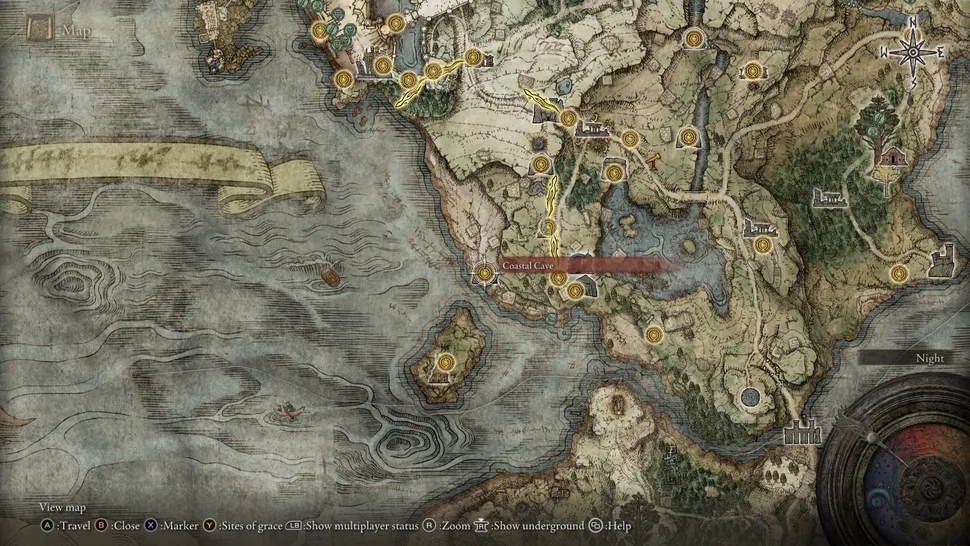
You can find this dungeon located in a cave entrance on the beach directly facing the island in the southwest. The first room is filled with goblin-like creatures, who will scream at you before attacking, giving you a chance to strike first. Kill them off then head into the boss. The Demi-Human Chiefs are two aggressive beast-like creatures that run on all fours but can be easily cheesed with the Wild Strikes skill and by fighting them separately. If you’re struggling, summon Old Knight Istvan to help. This dungeon is important since it gives you access to the island south of Limgrave.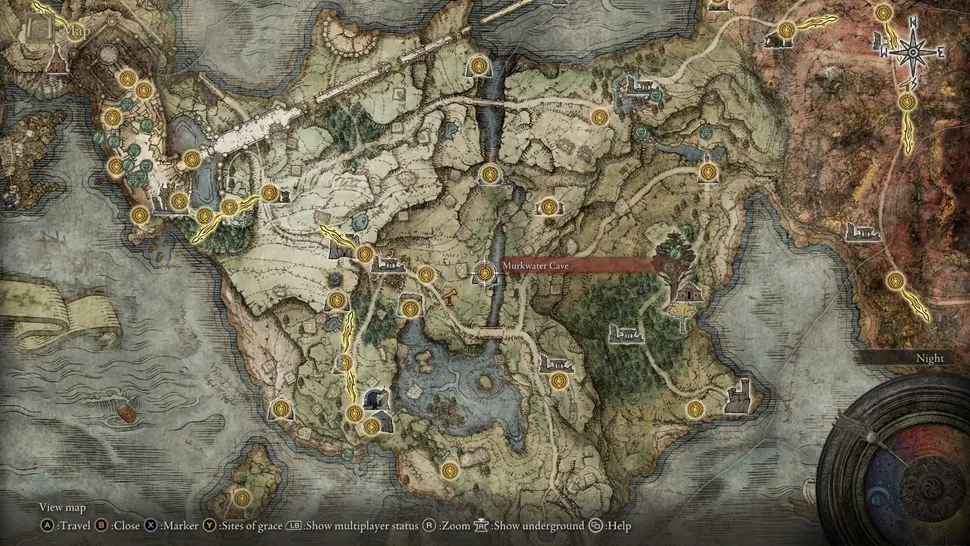
Head to the north side of Lake where you fight Agheel and go under the bridge where the skeletons are. Further up, on the left side you’ll see a cave, though you’ll be invaded by Bloody Finger Nerijus, so watch out. Once Yura has appeared to help you deal with him, head into the cave. This dungeon is very easy. Either be sneaky and watch out for tripwires or just kill all of the bandits in there. Head down the left corridor to the boss door. The boss of this dungeon is good ol’ Patches. Open the chest and he’ll try to rob you. However, if you get his health down to half, he’ll surrender and you can talk to him. 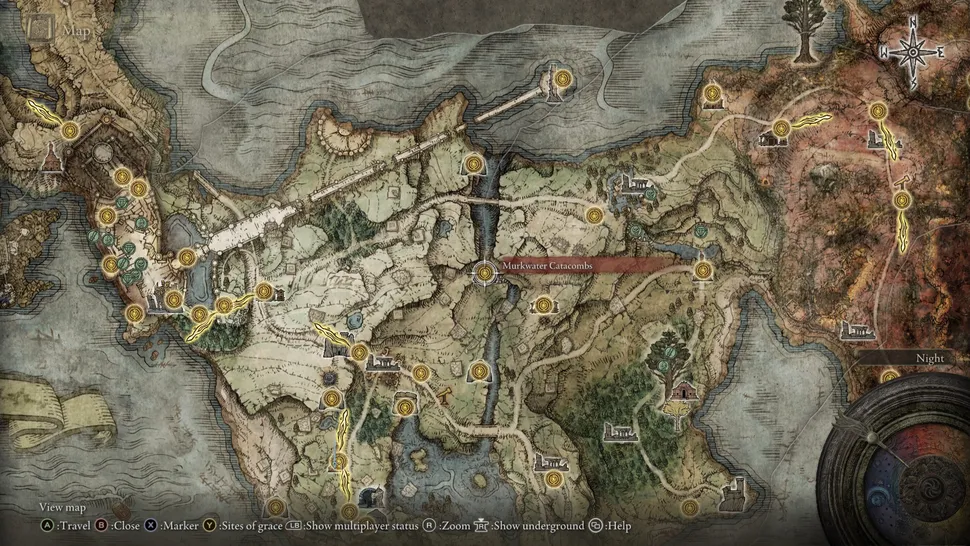
Head north up the river from Murkwater Cave and turn left into a cavern filled with bodies, and gravestones sticking out of the walls. Go to the end and you’ll find a set of double doors that let you into the catacombs. When you head down from the site of grace, watch on the left for an Imp pretending to be a statue, as well as one hiding on the roof. Straight ahead of you will be a trap tile, and two imps throwing knives. You can use the trap to kill them, or go in close—just be aware of the imp hiding around the left corner.
Pull the lever. Head back and turn left, looking out for another trap: two imps pretending to be statues on either side of the door, and one to the left around the corner. Head through to fight the Grave Warden Duelist. This hammer-hefting warrior isn’t too hard to beat if you stay close to him, though watch out for his grab attack in the second phase. 
From the Murkwater Catacombs, head north along the river filled with the giant tentacle creatures. You’ll have to use the spirit spring to jump out to access it. At the very end, where the river meets the sea, you’ll find a cave entrance on the left. Head in and drop down the hole using the platforms. You’ll enter into a room with another hole and wolves. Kill the wolves and drop down this next hole using the platforms. There isn’t a platform for the last jump, but you can roll onto the lip of the hole before dropping down.
Now there are two tunnels. Head right into the fire-lit room with two more wolves. Head left through the barrels to find a point where you can drop down on a white wolf in the next room, but watch out for the wolf behind you. Head through the cave arch into the next room for a view of a cave cistern.
Descend the platforms watching out for bats, especially from the cave by the waterfall on the left of the path. Next, drop off the waterfall, jump to the broken pillar and fight the bats to find the Shamshir weapon. In the next room, you’ll find one of the giant tentacle creatures. They are tanky, but throwing Kukri from range absolutely destroys them, so they appear to be weak to bleed damage. Head through the tunnel on the right until you’re back in the main chamber, then drop to the left down by the waterfall and carry on through the passage to find the boss.
The Guardian Golem is the same as the ones you find on the bridge towards the divine tower of Limgrave. Like Tower Knight from Demon Souls, you can hit his ankles to make him fall over, but watch out for his stomps, and the attack where he leans down to breathe fire.
Sarah’s earliest gaming memories involve playing Jet Set Willy on the ZX Spectrum at a friend’s house. These days, and when not writing guides, most of her spare time goes into MMOs—though she’s quite partial to JRPGs too. She has spent much of the last decade playing the likes of Star Wars: The Old Republic, TERA, Final Fantasy 14, and World of Warcraft. Sarah has been writing about games for several years and, before joining PC Gamer, freelanced for the likes of TechRadar, GamingBible, and Rock Paper Shotgun. One of her fondest hopes is to one day play through the ending of Final Fantasy X without breaking down into a sobbing heap. She probably has more wolves in Valheim than you.
Sign up to get the best content of the week, and great gaming deals, as picked by the editors.
Thank you for signing up to PC Gamer. You will receive a verification email shortly.
There was a problem. Please refresh the page and try again.
PC Gamer is part of Future US Inc, an international media group and leading digital publisher. Visit our corporate site.
© Future US, Inc. 11 West 42nd Street, 15th Floor, New York, NY 10036.


 de Juego de Tronos(Game of Thrones)")